Showing posts with label herbs. Show all posts

Tuesday, July 30, 2013

Radicchio Apple and Grapes


It's been an exciting week with daily rain and thunder showers then amazing blazing sunny periods. the veg patch Is loving the weather, im not so sure about it myself. The week was made even more exciting when the video card in our computer died, oops. Could be a few weeks till its back up and running! So this post is being written entirely from my smartphone. Which with the blogger app isn't as bad as I would have imagined. 

The up side is my Radicchio Treviso plants are looking fab, and I've decided to try out a recipe I've earmarked for a time like now when my plants were ready. The recipe is adapted from Around my French Table, by Dorrie Greenspan, (see Bookshelf Page, above) a must have for any enthusiastic chef who loves entertaining with simplistic and delicious food. I love recipes that toy with sweet and savoury ingredients, so this one caught my eye.


Radicchio is part of the endive/chicory family of plants thats flavours range from faintly bitter to intensely bitter. The Bitterness can change during the growing season too, depending on outside temperatures, cooler temperatures aiding in a more mild flavour. The bitterness mellows with cooking as well, adding a bit of cream helps too. This dish is slow cooked with salted butter, sweet grapes and tart apples balance out the bitter tones of the radicchio. One bite is bitter the next sweet and savoury, its a flavour sensation, and a little rosemary undertone sews the whole plate together. Enjoy! 


______________________________
Radicchio, Apple and Grapes
Serves 2 as a main or 4 starters

Making this dish reminds me of cooking a tart tatin, the aromas of the butter caramelising with the apples and grapes are part of the reason. Another is the time involved, patience is key. Everything needs to be soft and melting for this dish to be perfect. 

2 medium heads Radicchio Treviso or 1 large head, halved for medium heads or quartered for large
1 1/2 Gala apples, quartered and cored
3 small clumps of green grapes
3 -4 small sprigs rosemary
2 tablespoons salted butter 

• place a large sauté pan on a low heat , add the butter and let melt. 
• place radicchio in pan cut side down, fill in gaps with apples, grapes and rosemary, leave to bubble away slowly for 20-25 minutes
•check to see if everything is caramelising, if not turn up heat a fraction and wait to turn the fruit and radicchio.
• once browned flip everything over and repeat cooking another 20-25 minutes
• poke the radicchio, apples and grapes to make sure they are soft, check got caramelisation, if ready remove from heat and plate. If not let cook longer adjusting heat if necessary.
• add a small bit of water to the pan to make a scant amount of sauce and spoon over the finished dish

Friday, July 19, 2013

Salads Everyday

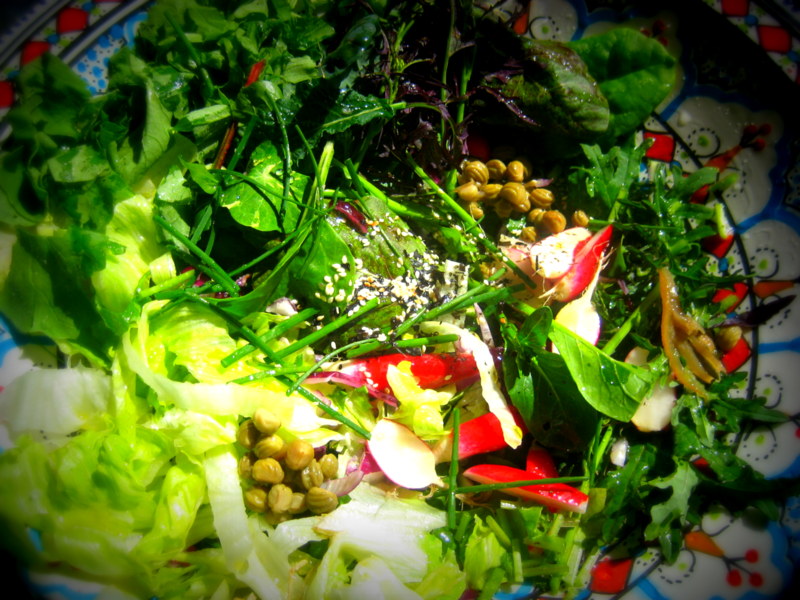
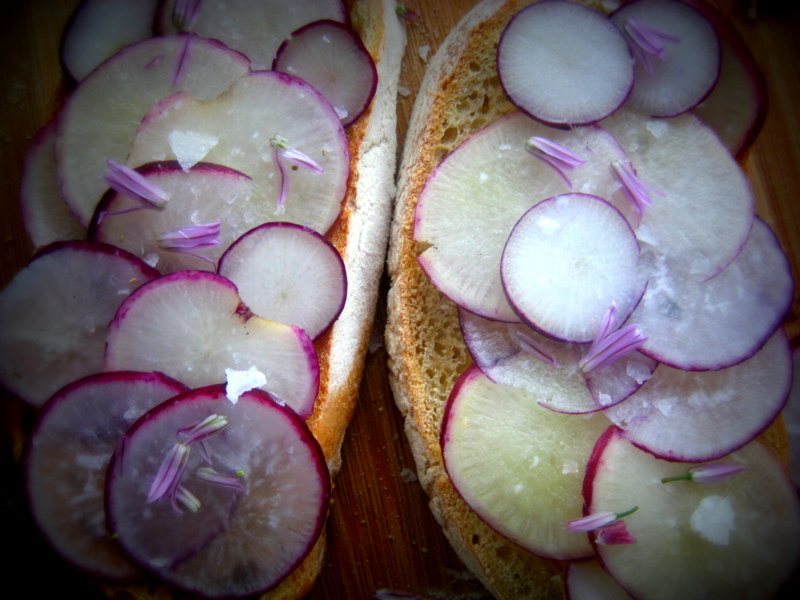
French breakfast radishes with greens
here in west cork, we are having the best weather in it seems like a century! you don't even want to think about cooking, its that warm. spain is even cooler than here, global warming? maybe. does it matter? not right now! (i'm half joking there) we seriously haven't had rain in weeks.

despite the lack of rain, one of the great things about this time of year is every time i go to the garden, there's something new to pick and chop up into a salad. which is great for a hot afternoon.
there's cauliflower, courgette, cabbage, kale, peas, beetroot, radishes, spinach, lettuce, onions, chard.... you get what i mean? its a great time to have a garden and this post is a celebration of that fact.

there's no recipe today but there's more posts on the way like: a tangy slaw for tacos, elderflower fizz and cocktails (yes, MORE cocktails!) and a recipe that goes great with crispy calamari. enjoy the photos, there's loads more on the FWDR instagram page.


little gems are a great lettuce to grow if the slugs don't get to them first!


smoked mackerel with chard, fennel and flowers

Monday, July 8, 2013

Lemon Thyme Whiskey Sour

 
thyme is by far my favourite herb, and among that my favourite type is lemon thyme. the lovely citrusy notes to the earthy sweet herbal qualities make it great for cooking, baking and infusing into cocktails. like this infused simple syrup, its so easy to do. the syrup will keep for months refrigerated in a clean sealed jar.
 
I encourage you to seek out lemon thyme at your garden centre, just one sniff of this herb well sell you on buying two plants, mine has been used down to a little nub! I hope it grows back for more of this cocktail lover approved tipple! my syrup only lasted a week with my friends, better double up when the plant rejuvenates! this whiskey sour is great for summer barbecues or all night drinking sessions.
 
naturally one is enough but three is always better!


___________________________________________________
Lemon Thyme Whiskey Sour
Makes 1

inspired by: The Seasonal Cocktail Companion: 100 recipes and projects for 4 seasons of drinking, by Maggie Savarino. a pricelessly inventive cocktail book!

2 measures Whiskey, your preference, I love Bushmills
1 measure Lemon Juice
1 measure Lemon Thyme Syrup (recipe follows)

for Lemon Thyme Syrup:

3/4 cups (180gm) white sugar
1 cup (240ml) water
1 good fistful lemon thyme or thyme
  • using a mortar and pestle crush the thyme with a little sugar, or bruise with your fingers
  • place all ingredients into a sauce pan and bring to boil stirring occasionally
  • let cool and strain out thyme
  • store in a sealed jar in the fridge for 1-2 months
for drink:
  • place all ingredients into a large jar or cocktail shaker with a good amount of ice
  • shake or stir until well chilled
  • strain into a glass tumbler or cocktail glass filled with ice
  • garnish with thyme sprig or thyme flowers and a cocktail cherry

the creative process
 

Wednesday, June 5, 2013

Polytunnel Build

about a month ago I set up shop to build a small polytunnel, to cover the new 'herb only' addition to  the veg patch. I took the idea and design from my neighbour's who own Cambium Garden Centre. last year they grew the most amazing basil plants and lettuces, I was sold on the idea. everything seems to grow better under plastic in Ireland. that said we seem to be experiencing a drought! im afraid to mention it else I jinx the good fortune we've been having. at the moment watering the garden has become a novelty!
 
below are some images of the polytunnel build as it progressed over one week. it's a great design as it can be opened from both sides. with over 2 feet of standing room for plants you can grow just about anything, bar: sweet corn and tall tomatoes. this bed is being held as a herb bed for basil, parsley, sage, rosemary, mint, thyme, lemon thyme, coriander, fennel bulb and lemon balm. just about every herb you can dream of - which should make for some interesting pesto recipes!  the dimensions are 3'x 14' so, 42 square feet.
 
empty bed constructed of pallet wood

6' lengths of 1'' piping doubled up at four points, 2'' would be ideal

2"x1" brace under piping and ends covered in polytunnel plastic, stapled at bottom
 

Sunday, April 14, 2013

Rhubarb Jelly Doughnuts with Lavender Sugar


here's another spirit lifting recipe for those of you experiencing this crazy 'spring' weather. its been mostly windy and rainy the past week, but the soil has warmed up. there's new life emerging in the raised beds at last! all the garlic is up with some radish, beetroot and frilly red mustard, too. we are also due for the hatching of some new chicks, from our lavender pekin bantams. so these doughnuts are also a little tribute to them, too.

is spring here, yet? it better be!
 
 
i wanted to call these dough nuts: 'rainy day rhubarb doughnuts' because they are perfect for a rainy day afternoon spent in the kitchen. these doughnuts may seem tricky to make but with a a couple hours, a few basic ingredients and tools - you'll be in jelly filled doughnut heaven. i've always wanted to make jelly doughnuts, mainly because im a sucker for deep fried foods, and who isn't? (i even tried beer battered bacon once!) but also because a good jelly doughnut is complete bliss and as it turns out - very obtainable in the home kitchen.


i couldn't wait to put rhubarb on the blog, either. after the winter we've had its a welcomed bit of colour and tang to the gardener's kitchen! im fortunate to always have friends or family who grow rhubarb, so i've never planted my own crowns. the crowns take a year or so to establish before harvesting, which doesn't really fit into a semi-nomadic lifestyle. but saying so, every working veg patch should have a couple rhubarb plants, for a 'hungry gap' fruit boost. maybe this is my year to plant my own?


this recipe is completely from scratch, all the way to making the rhubarb jelly filling. but you could use any jelly or jam you have in the house, just beat it a bit before piping into the fluffy doughnuts. the lavender sugar coating is super easy to blend up, so give it a whirl. but if you don't have lavender buds plain sugar will do! or maybe a different herb (i.e: rosemary or thyme)?  the lavender has a calming effect for when you really want to be outside but the weather won't allow it.

doughnuts as medicine? why not!


Monday, March 18, 2013

Charred Purple Sprouting with Hollandaise and Poached Eggs


what a change in weather from last week! we've had some rain but the frosts subsided and its just begining to feel like spring. just in time cause it was starting to get me down! (see last post) for paddy's day this year i spent the afternoon in the garden, a long awaited treat. i planted seed potatoes as many people did for paddy's day, (it seems to be a tradition here in ireland.) i opted for three floury types: coleen's (a first early crop), record (main crop) and golden wonder (a late main crop). i wanted to try and introduce a bit of crop roation to my current garden's second year. so i planted them where i planted roots and onions last spring.


the idea of crop rotation is an old one. the basis is: different plant families take different nutrients from the soil as they grow. in turn they release new nutrients to the soil that benifit other plants. in a lot of vegetable gardens this determines alot of the seasons planting scheme. after some research there turns out to be some debate on what rotations people use. im following a four year rotation plan:
 
LEGUMES > BRASSICAS > ROOTS & ONIONS > POTATOES
 
do you use a different roation in your garden than the above one?


after planting spuds i was able to clear bolting kale plants, weed the flower beds and sow my first bit of lettuce, radish and beetroots. i popped in some garlic sets for good measure and much needed slug protection. in the lettuce area of the garden i was hoping to create an artistic planting effect by alternating plants with different colours and textures: frilly red mustards next to a row of little gem lettuce heads, followed by red beetroot and a row of pea shoots. its an exciting prospect to add a bit of colour and intrest to the veg plot. we'll see if it turns out as planned! fingers crossed.

Monday, December 31, 2012

Lemon Geranium Custard Cream

Lemon Geranium Pelargonium crispum

 this is my new favourite dessert or dessert accompaniment. it brings the unexpected geranium leaf into the kitchen and not just the window sill, the flavour remains lemony familiar but with a hint of the exotic.

my lemon geranium plant was given to me as a cutting from my friends plant, earlier this year. i had seen a recipe for rose geranium cream in the cookbook: Tartine, from the now famous Tartine Bakery in San Francisco. the recipe itself got me thinking, why not lemon geranium as a substite? im not suoer wild about heavy rose flavours in my desserts anyway. the result was an exciting flavour reminiscent of a lemony turkish delight. its great alongside any sponge cake or as a filling for tarts.

hot milk steeping with geranium leaves

Friday, November 16, 2012

Homemade Sour Apple Vodka


im to the point of being obsessed with infused spirits, last year it was foraged blackberries and a spiced quince vodka. this year im trying out my own sour apple vodka for Sour Apple Martini's, click here for the recipe. homemade infused spirits are simple to make, time and aggitation (a good shake) are the key - my quince vodka from last year hasn't stopped improving since it was ready for consumption. 6 weeks seems to be the consensus for good flavour when infusing spirits, but a month is perfectly alright.
this year's theme is 'apples,' our cupboards are filled with a mass of infusing spirits. we've got damsons stewing away alongside, apple and cinnamon, plain apples, apple and clove and of course this Sour Apple Vodka.


a few more ideas on my infusing to-do list are: black pepper vodka for bloody mary's, cucumber gin for gin and tonics, pear brandy for well - pear brandy, rosemary vodka for a winter martini, mint whiskey for mint juleps.... its endless: ginger, pineapple, elderflower, horseradish, pumpkin, spices, herbs, fruit, leaves, brownbread (?), cardboard (?) - why not? ok, maybe those last two were a bit adventurous.

the idea is: any spirit can be infused and anything can be used to infuse it. homemade spirits are a great gift too, and are sure to be consumed and disappear. solving that age old dilema, what can i get that person that won't just sit on a shelf collecting dust? infused homemade booze is as good as it gets.

Monday, October 1, 2012

No-Knead Focaccia Loaf- and a garden tour


i started this blog as a way to share my garden, the food i cook from the garden, with more people. i feel like now is a good time, the end of summer, to show-off this years veg plot at the height of its glory. i started this plot in march of this year, creating the raised beds with recycled scaffolding boards. a friend of mine found a great source for them at a .50 cent a foot for damaged or unusable boards. these were cut to shape, with a jig saw and screwed together with a bit of galvi-band. the finish on the boards is with an outdoor mahgony coloured furniture stain, which i've used on everything stainable, veg crates, doors, garden furniture, you name it. after that we (me, my other half and 4 friends) filled the beds with a third topsoil, then another third with really old sheep manure (a thoughtful gift from friends of mine!), then the top third with compost from the local recycling center, in bandon. it worked out at 40 euro for all the compost. all in all the beds cost around 80 euro to fill and build. not bad.


clockwise , beetroot and rainbow chard, red russian kale plants


old spud patch (they grew 6foot long)

 
i was inspired by joy larcom's book, Creative Vegetable Gardening (see side bar), for my garden design and all of my planting scheme. i wanted to create a small space within the garden to be able to use for entertaining, eating and enjoying the garden. i went for a square 'C' shape, with a willow arch over the entrance. its my favourite garden i've had in the dozen or so i've created in the past. from joy's book i tried to add intrest by interplanting different textures and colours of plants and planting crops on the diagonal instead of straight lines.


purple sprouting, and red russian kale
leeks, seeding radishes, and squash, lots of nasturtiums
 

i didn't actually want  or need this garden to meet my eating needs throughout the year, i dont have time to grow all that veg! but rather to just be able to grow the interesting veg i want, enjoy the process of growing them and create an outdoor space to be in. and to my surprise i've had loads of veg, almost more than i need! since the begining of the lettuce season the beds have been giving me loads of choice: from beetroot, to romanesco, spuds, mangetout, onions, courgette, beans, chard, celery, lettuce, herbs, and loads of sweet peas - and theres even more to come!
celery, courgette(front corner), celeriac, beetroot and chard

more purple sprouting, asparagus, purple beans, celery

Friday, August 31, 2012

Beetroot: part 1 of 3 - Minted Beetroot Hummus

'Bolivar' Beetroots

welcome to the begining of a three part beetroot bonanza! ive decided to dedicate the next three posts and recipes to this, king of root veg. the earthy sweetness of beetroot makes it perfect for an array of recipes even cakes and sweets! it comes in all sorts of colours, the 'chioggia' being the trendy one at the moment, with its pink and white bulls eye patterning. but my all time favourite has to be golden  beetroot, especially because im finding it hard to source seeds here in ireland. its been tempting me to smuggle some in the post next year. anyone flying over from the states, perhaps? the golden beetroot is great for salads and paired with its bloodier brother adds a bright suprise to a sunday roast. the best part is that golden beetroots don't dye your hands or other foods - they're just polite that way. they can also be used in the same recipes as regular red beetroots.

triple planted beetroot


disregard my love for golden beetroots, because the next three recipes are all going to feature the red guys. ive got a recipe for a minted beetroot hummus, candied beetroot truffles, and another -veggie cocktail! you're listening now, right?

i've only actually tried one of these recipes, so i hope i can pull the other two off with out too much blood (or juice) on my hands. and since its raining everyday (bar today and yesterday!) ive got an extra couple hours to spend in the kitchen. but there's some great news i've learned from a new book i'm reading: How to Grow Winter Vegetables, by Charles Dowding, he says that wet crappy summers are great for winter veggies! (without the 'crappy' part) and summer blogging (he didn't say that, either) so its not so bad, really!


Growing beetroot: i once read in a companion planting article its a good idea to plant beetroot with onions , and the past two years i've grow them side by side in the same drill and i had beetroot harvests within 3 months of growing, as well as big onions. this year i grew them seperate and they have taken longer to mature. i always sow my beetroot direct into the ground, ive found it hard to transplant beets without losing a few in the process.
while the roots are forming its ok to take a few leaves for salad every so often, just don't take too many leaves or the roots may take longer to develop.
for the best flavour its best to harvest beetroot once it reaches the size of a golf ball or as large as a snooker ball.
beetroot is a biennial plant, which means it flowers in its second year. they do keep pretty well in the ground in winter and store well in a cold larder, if dug up, for a good few weeks.